Thursday, January 19, 2012

Revamping a Chandelier: From Brass to Black

When you take on the largest renovation of your short home-renovation career, you've gotta save cash anywhere you can. I'm fairly sure we probably should have found a few more places to save, but that's a whole other can of diet pepsi... Anyhow, when buying the dozens of light fixtures it took to remodel all of other rooms, I decided to wait out replacing the chandelier in the formal dining room. I knew I could save it -- at least short term -- and give us a chance to play a little catch-up and maybe decide exactly the direction I wanted to go with the room. Best case, I save us a couple hundred bucks; worst case, I waste some time and render the brass light fixture unusable. Luckily, I saved the builder's brass from a landfill grave and here's how that transformation went down.

*BEFORE*
The chandelier in all its pre-painted brassy glory:

1. I covered the individual light "candles" with plastic bags and painters tape to save them from spray.


2. Before painting, I lightly sanded the entire fixture with a fine grit sandpaper. Important step because without taking the shine off the brass, the spray paint won't stick.

3. I started spraying...and spraying...and spraying. Lots of light coats give the best results and keep the from doing the dreaded "drip." (I use satin finish spray paint, by the way...I don't like it too glossy.)

4. Apparently this is when I stopped taking pictures. It's also when I decided that oil-rubbed bronze wasn't working for me. I switched to black and did the final two coats with a new can. This is also the point that I hung the chandelier from the garage door supports in the garage so I could cover all of the hidden spots. Make sure to use a bright light or you will find a spot you missed...and not be happy. I may or may not know this from personal experience. 

5. This is also the point where I covered the individual lightbulbs with shades. There are tons of shades and styles you can use here. I went simple with a light brown--they were $2.99 each at Hobby Lobby, but as any HL shopper knows, I waited until they were 50% off. At around $1.50, this is a steal compared to some of the more expensive online options.

6. And the "after" shot. I think I may add a cord cover, but like everything else in our house, it is a work in progress. (Sorry, not the best "after" pictures -- I ran and snapped them, mid-post.)


Final Cost:
Spray paint (it probably only took one can, but I used two because I switched colors) $15
Light shades (12): $18 + tax
Baggies, painters tape, sandpaper: already had on-hand
TOTAL: $33

And one more quick look at the before and after:


Wednesday, January 18, 2012

House Tour: Powder Bath -- Before & After

Moving right along... 

This little jewel box was my personal design victory in the remodel. When deciding on the look of the powder bath, I knew two things: 1. The walls would be light blue. 2. The floors would be concrete and have an etched checkerboard-ish pattern. When we met with the concrete contractor, he questioned my coveted checkerboard saying the room was too small for it to look good and he didn't recommend it. Argh... Of course, I pretended to take his expert opinion to heart, all the while dismissing his words the second they left his mouth and hit the dust-filled air of our disaster zone. Poor guy didn't have a chance. 

What once was a green/burgundy/brass/wallpaper catastrophe (are you seeing a whole-house theme with the previous color scheme?) is now a sweet room and the perfect place for guests to powder their noses. We used a light aqua/turquoise wall paint, painted out the cabinet black, replaced the pedestal sink for a more substantial model, and recycled the existing mirror with a coat of silver leaf. A new faucet, vanity light, and of course, the acid-stained concrete floors brought this room into the here and now. Buh-bye yesteryear. 

The details:
Walls: Sherwin Williams Waterscape
Trim and Woodwork: Sherwin Williams Dover White
Cabinetry: Sherwin Williams Tricorn Black 
Vanity Light & Faucet: Overstock.com
Pedestal Sink: Home Depot
Concrete Floors: Black and Vintage Umber Concrete Stain *I wanted to use Amber instead of Vintage Umber, but I actually did take the contractor's advice that the Amber would be way too light and look more like plain ol' concrete.

*BEFORE*
Holy moly, are you dizzy with this paper?


Hollywood lights...sweet!


*AFTER*


Still to-do
Add towel hook/ring, toilet paper holder
Cabinet hardware

Monday, January 16, 2012

House Tour: The Study -- Before & After

Just off the living room, the study is one of my favorite spots in the house...probably because I spend so much time in there! It's a great room with lots of light and I like to peek out the windows and daydream a little while I work. 

It started as a 90s nightmare. Okay, that's being a bit dramatic... I'm sure back in the day I would have looooved the hunter green paint and maroon wallpaper border that graced this room. Oh, thank goodness that some things change. Add to that more of the lovely pickled wood and a fancy brass ceiling fan and I'm sure this was the perfect place for some mid-90s productivity.

The transformation was pretty easy here -- painted out the woodwork (a dark, dark gray that reads gray/brown), walls, and plantation shutters, replaced the brass doorknobs with black levers, and carried the hardwoods from the adjoining formal living room. You also might have noticed here, and in the living room, we changed the direction that the wood floors run -- much better flow and continuity, I think. I know a chandelier would have looked great here, but I tend to run hot when I'm working so I had to go for the the ceiling fan. Maybe someday I'll have less work to do and can add some kind of chandy, but in the meantime, I need a breeze, man.

The details:
Walls: Sherwin Williams Thunder Gray
Trim and Woodwork: Sherwin Williams Dover White
French Doors: Sherwin Williams Dover White
Wood Floors: Custom stain mix, satin finish
Ceiling Fan: Lowe's

*BEFORE*


*AFTER*


Coming up next, our adorable powder bathroom!

Saturday, January 14, 2012

House Tour: Formal Living/Dining Room -- Before & After

Now that you've seen the outside, we'll start making our way through the rest of the house. Here's the formal living room and the formal dining. These rooms are the first rooms you enter from the front door. There are some really great features including super-high ceilings, tons of built in bookcases, a fireplace, and fantastic windows overlooking the patio and backyard. 

When we bought this house, the living room had some lovely carpet with wood in the adjoining entry, formal dining, and study. Of course, I had my all-too-talented dad on the case and we ended up with some amazing hardwoods. (I'll talk more about those in another post, another day.)

We are using the original front door and updated it a bit with a coat of black. We also replaced the handles in here and throughout the house with black levers. Eventually, we'll replace the door with something else because it is definitely not our style, but for now, it is fine.

We also painted out the walls, all of the circa-90s pickled/glazed woodwork got a few coats of creamy white lacquer and we updated the original brass-finished lantern with a fun metal/crystal pendant light. The French doors went from white to black.

In the dining room, we used the same color on the walls and crown moldings and also painted out the plantation shutters (sounds easier than it actually is). I saved the ugly brass light fixture in here with a really easy transformation that saved us a few hundred dollars. (I'll take it where I can get it!)

The details:
Walls: Sherwin Williams Modern Gray
Trim and Woodwork: Sherwin Williams Dover White
French Doors: Sherwin Williams Tricorn Black
Wood Floors: Custom stain mix, satin finish
Light Fixture: Overstock.com

*BEFORE*


*AFTER*


Future to-do:
Replace front door
Replace windows
Update fireplace handles; replace gas-burning logs with something more modern.

Friday, January 13, 2012

Pending!

So, so relieved. Today we accepted an offer on our "other" house. The one that we still owned when we decided to move into this one. I wouldn't recommend this, by the way. It was a little nerve-wracking to say the least. And we had so much real estate on our hands that it kept us from flipping. Once we unload the other house, we can flip again. Oh, happy day!

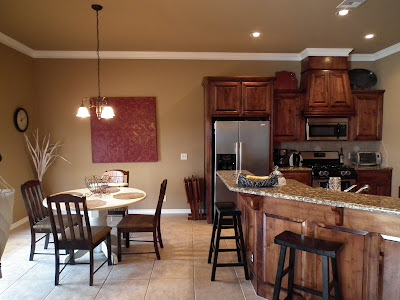
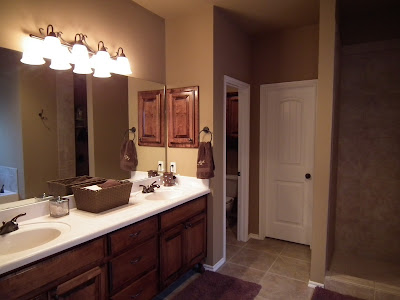
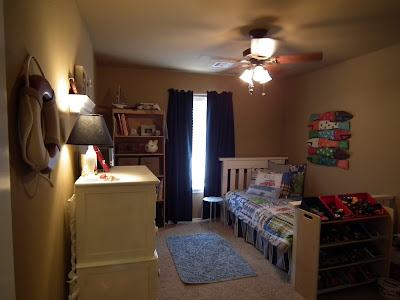
In honor of our pending sale, here's a quick look at the house we used to call home (these are the MLS pictures and show the house staged for the market):


This was a great in-between house for us. Beautiful hardwoods, awesome soaring ceilings, and owning this house helped us figure out that it was our favorite area of town. Plus, baby Asher was born while we lived here. Here's to a smooth, quick close and a happy future for the new owners!